Processing a work order in the mobile app
When you first log in, based on your user permissions and your account configurations, the work order list may include the following work orders. *Note: If you are not seeing what you expected on your work order list, please contact your system administrator to discuss your user permissions.
- Work orders you created
- Work orders that are assigned to you
- Work orders for the location(s) that you are assigned to
- Work orders tied to the work categories for the department that you are assigned to
These work orders will include a brief description of the work requested, status, and priority. You can use the search ( ) and filtering (
 ) options to filter the work order list to include work orders for other locations and sites that you are assigned to.
- A "There are no matching results" message will show under the following circumstances:
- You have not created work orders for the selected location
- You are not assigned to the selected location based on the Location Assignments set up for your user account
- You have not created or been assigned to work orders for the selected location that are tied to your assigned work categories based on the Work Category Assignment set up for your user account
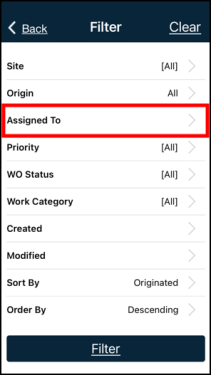
By default, you will see all work orders that meet the criteria above. However, if you only need to see work orders that are assigned to yourself, you can use the filter option.
- Tap on the filter icon (
 ) from your work order list.
 - Tap on the Assigned To filter.
- Select your name from the list of users.
- Tap the Filter button at the bottom of the screen.
- Your work order list will now only show work orders assigned to you.
Processing assigned work
- Tap the Work Orders icon at the bottom of the screen.
- Tap on the work order you need to process. *Note: You will not be able to update a Completed work order.
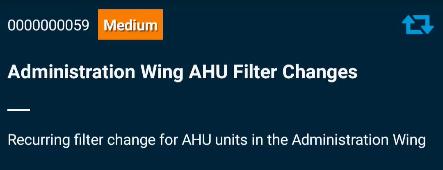
- The top of the work order will include important details such as the work order number, priority, title and the work requested. Preventative Maintenance work orders will have a (
 ) icon in the upper right corner.
- The remainder of the work order is broken up into collapsible and expandable cards. Your organization my require you to address some or more cards covered in this help guide. We recommend filling out as much information as possible to improve your organization's data integrity. *Note: Some cards may or may not appear depending on your organization's configuration.
General
- The WO Status is an important field where you can update the progress of this work order as needed. For example, you can mark the work order In Progress as you begin the job, and mark it Complete when you have finished the job. *Note: The statuses available will vary based on the current status of the work order.
- The Source Type will indicate whether the work order is associated with a Site, Location, or Asset. If the work order was entered with the incorrect Source Type, you can change it here. *Note: Changing the Source Type can alter the remainder of the work order form.
- Take note of when the work order is Expected to be completed as well as how long the work order has been open in the Days Open field.

Source
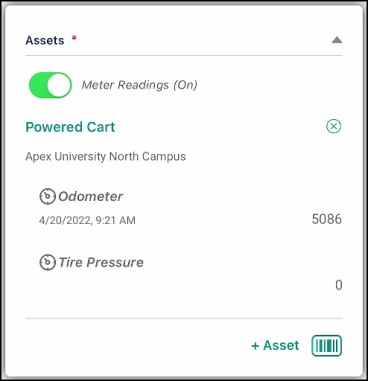
The source card describes what the work order is associated with and will either be titled Assets, Locations, Site, or Meter Title. If the work order is associated with one or more assets or meter titles, the option to enter meter readings will appear in this card.
Entering meter readings for an asset based work order
- Scroll down to the Assets card. *Note: The work order must have a Source Type of Asset in order to collect a meter reading.
- Tap the Meter Readings toggle to the on position.
- Tap the Add Meter Reading button or tap on the specific meter title in the list to auto-populate the meter reading form with the asset and meter title.
- If the work order has multiple assets, select the Asset.
- Select the appropriate Meter Title.
- Enter the Meter Reading.
- Tap the Collect Reading button. This will save the meter reading to the asset.
- Tap the Save Work Order button to save the meter reading to the work order.
Entering meter readings for a meter-based PM work order
All meter readings should be entered before moving the work order to the next status. *Note: Work orders with a Meter Title work source are only created from meter-based PMs in your Asset Essentials web account.
- Scroll down to the Meter Title card.
- Only the meter titles associated with the meter-based PM will appear in the list.
- There will not be a meter reading or date and time stamp for your meter titles until a meter reading has been collected from this work order.
- There are three ways to enter a meter reading on this card.
- Tap on the specific meter title in the list to enter a new meter reading. This form will auto-populate the asset and meter title and also display the last collected meter reading.
- Tap the +Meter Reading button at the bottom of the card. Select the appropriate asset and meter title associated with the work order and enter the new meter reading.
- Tap the barcode scanner (
 ) to scan an asset associated to the work order. Select the appropriate meter title associated with the work order and enter the new meter reading.
- Tap the Collect Reading button. This will save the meter reading to the asset.
- Tap the Save Work Order button to save the meter reading to the work order.


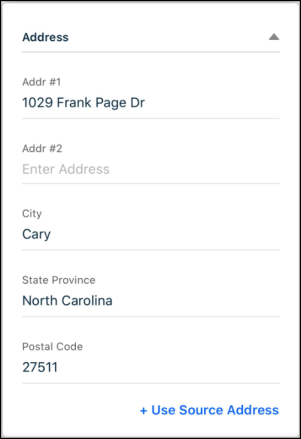
Address
If your account utilizes the Esri map, the address card will display. The address listed on this card might have populated from the coordinates of the user that submitted the work. This address may not accurately reflect where the work needs to be completed. You can update the address manually or by using the Use Source Address button at the bottom of the card to pull in the stored address tied to the work source for this work order.
- Tap the Use Source Address button at the bottom of the card.
- The address will populate based on the work source you have listed on the work order.
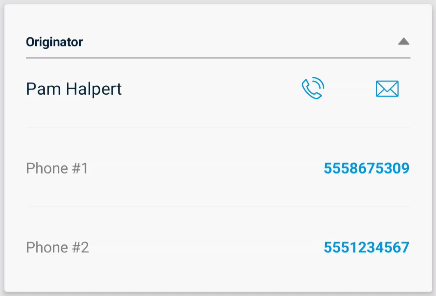
Originator
The originator card will display the user that requested the work. You can easily contact the originator for more information about the work requested as long as his or her profile has been populated with contact information. *Note: This card will not appear on PM work orders.
- If the originator has a phone number associated with their profile tap the call icon (
 ) to launch your device's dialer application. *Note: If the user has multiple numbers listed in their profile, this will call the number in the Phone #1 field. You can call other numbers listed in their profile by tapping the appropriate phone number.
 - If the originator has an email address associated with their profile tap the email icon (
 ) to launch your device's default email application.
Task
The Task card lets you access a list of tasks that are required to complete the requested work. If there are tasks on the work order, the Task card will show a progress bar representing the progress in completing all tasks currently on the work order.
- Tap the Task card to view the list of tasks.
- If you have completed an individual task, tap the check mark icon (
 ) next to the task.
 - If you have completed all tasks, tap the check mark icon (
 ) in the top right corner of the screen to mark all tasks as complete.
 - A task may ask you to enter a meter reading for a specific asset. Use the Enter Reading Here field on the Collecting Reading task to enter the meter reading. When you enter a meter reading, the task will automatically be marked complete.
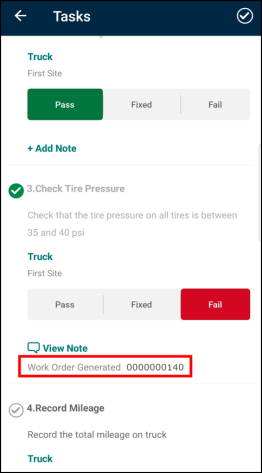
- A Pass/Fail task asks you to select whether the asset passes a review, fails a review, or failed the review but was fixed. When you select either Pass, Fixed, or Fail, the task will automatically be marked complete. *Note: You will be prompted to add a Note when Fixed or Fail is selected.
Copying a task book
You can also add tasks to the work order by copying a task book.
-
If there are no tasks listed on the work order yet, tap +Task Books to view a list of available task books that can be added to the work order.
-
If the work order already has tasks on it, tap on the Task card and then tap +Task Books in the top right corner of the task list.
-
Search for the appropriate task book in the list.
-
If the task book you need does not appear in the list, go to the Settings page under the menu and tap Refresh Account Settings. This will re-download all data from the web account and bring in any new task books that have been created. *Note: This refresh happens automatically every 24 hours.
-
-
Tap on a task book to select it. All tasks within the selected task book are now copied to the work order.
-
If you need to add tasks from another task book to the work order, tap the arrow icon to go back to the Work Order Details screen and tap Save Work Order. Then repeat the steps above to select the next task book. The new tasks will follow the tasks from the first task book and will be automatically renumbered based on existing tasks on the work order.
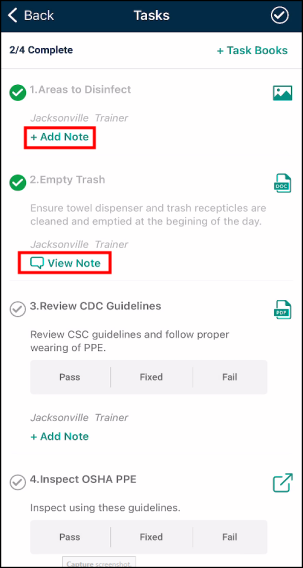
Adding a task note
- Tap on the Task card to open the task list.
-
Tap on + Add Note under the appropriate task.
-
Enter your note in the pop-up that is displayed.
-
Tap Add Note.
-
Tap the arrow icon to go back to the Work Order Details screen.
-
Tap Save Work Order to save the new note.
Updating an existing task note
- Tap on the Task card to open the task list.
-
Tap on View Note under the appropriate task.
-
Update the note in the pop-up that is displayed.
-
Tap Update Note.
-
Tap the arrow icon to go back to the Work Order Details screen.
-
Tap Save Work Order to save the updated note.

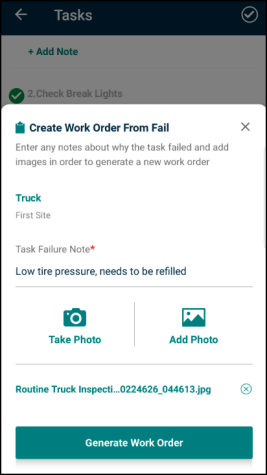
Generating a work order from a failed task
If you have a Pass/Fail task that is marked Fail, you can create a new work order right from the task for the follow-up work that needs to be done to fix the issue.
-
Select Fail from the task options.
-
The Create Work Order From Fail option displays.
-
The asset from the task will already be listed. If there is no asset on the task, the asset on the work order will be listed. *Note: If there are multiple assets or no assets listed on the work order, you will need to select an asset from the list provided to continue creating the new work order.
-
Enter a Task Failure Note. This will populate in the Work Requested field on the new work order. *Note: The first 50 characters of the Task Failure Note will also be used as the WO Title.
-
Add an attachment if needed.
-
Tap Generate Work Order.
-
You will see a confirmation that the work order has been created and will go back to the task list on the original work order to pick up where you left off.
-
That task will show the newly generated work order number for reference.
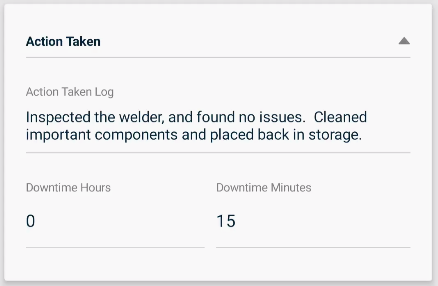
Action Taken
- As you complete work on the work order, enter what was done to address the work requested in the Action Taken Log field. We recommend providing as much detail as possible.
- If the work caused the related Asset, Location, or Site to be unavailable for a period of time, enter the Downtime Hours and Downtime Minutes.
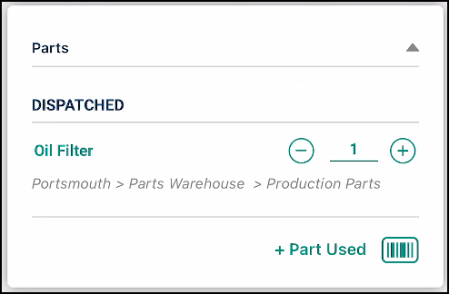
Parts & Inventory
This card is for logging any inventory parts used to complete the work order.
- Tap + Part Used to search and select a Part from your organization's inventory or tap the scanner icon (
 ) to scan a barcode of the Part.
 - Adjust the quantity used on the work order in the Qty field.
- Select the proper Usage Type.
- Tap the Add to Work Order button at the bottom of the screen.
- The part will be added to the work order and sorted by the selected Usage Type.
- Tap the part name to be taken back to the part form. Adjust any details or Delete the part if needed.
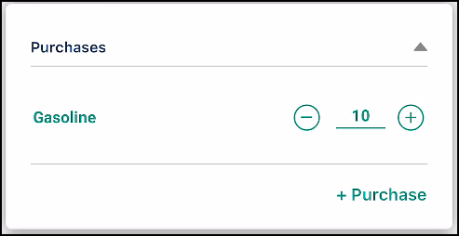
Purchases
This card is for logging any items purchased to complete the work order . Adding purchases will create non-inventory part transactions on the work order.
- Tap + Purchase.
- Enter the Name and Description of what was purchased.
- Adjust the quantity purchased in the Qty field.
- Enter the Unit of Measure and the Cost Per Unit.
- Tap the Add Purchase button at the bottom of the screen.
- Tap the purchase to be taken back to the purchase form. Adjust any details or Delete the purchase if needed.
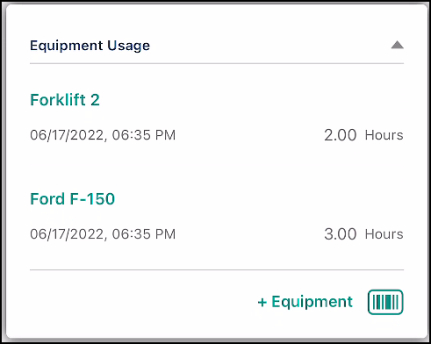
Equipment Usage
This card will help determine the operating costs for your assets.
- Tap the Work Orders icon at the bottom of the screen.
- Select the work order you need to add equipment usage to by tapping on the work order in the list. You can use the search () and filtering () options to quickly find the work order if needed.
- Scroll down to the Equipment Usage card.
- Tap + Equipment to search for and select a piece of Equipment.
- Select a Start Date & Time and an End Date & Time to reflect the amount of time the piece of equipment was used.
- Select an Equipment Rate or enter a Cost Per Unit.
- The # of field will display the unit of measurement for the selected equipment rate. *Note: If the unit of measurement is in minutes or hours, then the value in this field will auto-populate according to the dates and times selected. If the unit of measurement is in kilometers or miles, then you will need to enter the value in this field manually.
- Select a cost center in the Type of Maintenance field.
- Enter a Description if necessary.
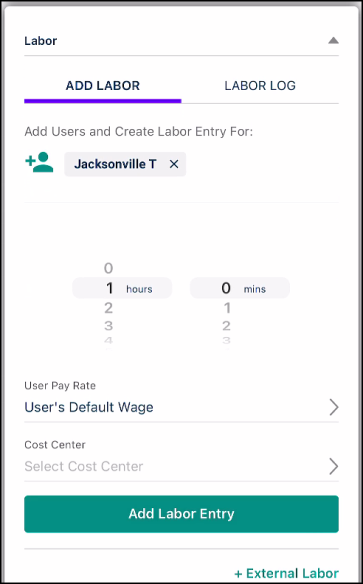
Labor entries
- By default, you will automatically be selected as the user who will be associated with the labor entry. If you have the appropriate permissions, you can tap the add user icon (
 ) to apply the labor entry to multiple users at once.
 - Adjust the slider to enter the exact hours and minutes worked. *Note: The slider may vary in appearance depending on the device you are using.
- Select the User Pay Rate. By default, the user's default wage will be selected.
- Tap Add Labor Entry.
- Once you add the labor entry the Labor Entries Card will show the Labor Log tab.
- To remove a labor entry, tap the remove icon (
 ). *Note: If your organization has the locked labor feature activated in your account, you will not be able to remove the entry and will need to create an adjustment to correct the amount of hours recorded.
 - To add an additional entry tap the Add Another Entry button.
- When you are finished adding labor, tap the Save Work Order button.
Comments
Be sure to note any comments included on this card. This could include additional information to help complete the request.
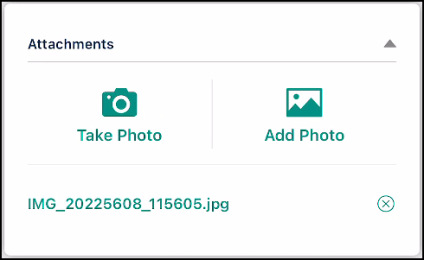
Attachments
The attachments section will include any photos that were submitted with the work order.
- Tap the name of the photo to view it on your device.
- To add additional photos to the work order:
Taking a photo
- Tap the Take Photo icon to launch your device's camera. *Note: Depending on the type of device you are using, you may be asked to allow Asset Essentials permission to access your camera. This permission is necessary for Asset Essentials to attach photos taken with your device to the work order. Tap Allow if you are prompted for this permission.
- Use your device's camera to take the photo.
- Once finished, you can tap the Editbutton to annotate your photo if needed.
- If you are annotating a photo, use your finger or a stylus to draw on the photo.
- Tap the Save button to add any mark-ups drawn on the photo.
- Tap Done.
- Enter a Name for the photo if necessary.
- Tap Save to attach the photo to the work order.
Adding a photo
- Tap the Add Photo icon to launch your device's photo gallery. *Note: Depending on the type of device you are using, you may be asked to allow Asset Essentials permission to access your photo gallery. This permission is necessary for Asset Essentials to attach an already taken photo to the work order. Tap Allow if you are prompted for this permission.
- Select the photo on your device.
- Once finished, you can tap the Editbutton to annotate your photo if needed.
- If you are annotating a photo, use your finger or a stylus to draw on the photo.
- Tap the Save button to add any mark-ups drawn on the photo.
- Tap Done.
- Enter a Name for the photo if necessary.
- Tap Save to attach the photo to the work order.